In this post, we’re going to guide you on the process of installing a bathroom mirror. Installing a mirror yourself can save you time and money, and also enable you to customize the finer details.
There are different types of mirrors that you may be looking to install. We’re going to make our guide comprehensive enough to cover all of them.
We will, however, describe the steps differently for normal mirrors and smart/LED mirrors. The processes for these two vary a bit, and we will make separate sections.
How to Install Normal (Non-Electronic) Bathroom Mirrors
First, let’s talk about the equipment that you will need for the installation process.
- Electric drill
- Screws
- Mounting brackets (as required by the mirror)
- Wall anchors
- Measuring tape
- Pencil
- Level
- Cleaning cloth
The materials you need are few and simple. The screws and brackets usually come with the mirror.
Now let’s take a look at the steps that you have to follow.
-
Find the spot for the mirror and prepare it
The first step is to prep the spot that you have chosen. You need to make sure that the place is clean and does not have any debris that can obstruct the installation of the brackets.
Simply take the cleaning cloth and rub the place dry. If you are installing the mirror as a replacement in place of an existing one, the cleaning part may be more demanding due to the build-up of dust.
If your existing mirror was in place using adhesive tape, make sure to get rid of it all and get the wall as clean and clear as possible.
-
Next step, measure the mirror’s dimensions
The next thing that you need to do is use the measuring tape and take the exact dimensions of the mirror. It is important to be very precise about this as it decides if the mirror fits on the brackets later.
Measure the length and width of the mirror. This applies if the brackets for the mirror are supposed to go on the edges (on the top, bottom, and sides.)
If the brackets are meant to fit into the mirror using holes or pockets in the back, you need to measure the distance between those holes/pockets.
This will allow you to see where the brackets have to be installed in the wall.


-
Make the markings on the walls and drill the pilot holes
After measuring the places where the brackets have to be installed, mark those spots using the pencil. Make small marks, but ones that are easily visible.
Once you have made the markings, drill the pilot holes in the wall using your electric drill. A pilot hole is a hole made in the wall so that a screw can be driven into itA wall anchor has to be placed inside the pilot hole to hold the screw.
-
Screw in the mounting brackets
Now, put the mounting brackets in place and use the screws to secure them in the walls. Use an appropriate drill bit for the screws so that they can be firmly entered in place. The screws for the mirrors (as well as the brackets) are provided along with the mirror, and they can have the Phillips head, the slotted head, the Torx head, etc.
Keep the brackets straight up against the walls, and hold them tightly when driving the screw in for the final push. When the screw meets the bracket, it can twist it and spoil the orientation.

-
Mount the mirror, check the level, and add the final touches
After the brackets are installed, mount the mirror on them carefully. Place the level on the mirror to see if it’s perfectly even. Stand back and take a look from different angles to make sure. If the level is not even, readjust the mirror to make it straight.
Once you are satisfied with the mirror’s installation, clean the surface with the cloth and clear away any debris around it.

This is the step-by-step guide that you need to follow for installing your bathroom mirror. Now let’s move on to look at the additional steps that are required for LED and smart mirrors.
How to Install LED/Smart Bathroom Mirrors
For the most part, the steps required for these mirrors are the same as the ones we’ve mentioned above. However, there are a few differences and additions, such as…
-
When choosing a spot for your mirror, make sure to pick one with an electricity outlet nearby
Normal mirrors can be installed anywhere, as long as the spot is suitable for you. However, with smart mirrors and LED mirrors, you need to pick a spot which is close to an electricity outlet.
And not just close; but reasonably close so that there are no hanging wires and cables to spoil the aesthetic of your bathroom once the mirror is installed.
Ideally, the outlet should either be behind the mirror, directly below it, or on the side
 .
.
-
Make sure that the LED lights are properly attached to the mirror
In most mirrors, the LED strips are attached to the surface using adhesive tape. During the transportation of the mirror and all the handling that it goes through, the strips can get loose.
Before the installation part, make sure that the LEDs are still firmly attached to
the mirror.

-
Test the LED lights after installation
The last thing that you need to do when working with an LED/smart mirror is to give them a test after the installation. If it is just an LED mirror, check if the lights are working fine and aren’t flickering, etc. On the other hand, if it is a smart mirror, try out the other functions as well, such as de-fogging and light dimming.
What is Caulking and Do I Need It When Installing My Mirror?
Caulking (or just caulk) is a material that is put inside cracks and gaps to seal them against leakages. This material usually consists of silicone, and is applied via a caulking gun.
When you’re installing mirrors in your bathroom, you can need caulking if the mirror is recessed. In a recessed design (when the mirror is sitting flush with the wall) there can be large gaps between the edges of the mirror and the wall, which you have to fill with caulking.
There are quite a few benefits of putting caulking in these gaps, including:
- Neat and clean look: Caulking can help blend the mirror in with the wall and give a cleaner look.
- Protection against damp and mildew: With the caulking in place, water and moisture won’t be able to get behind the mirror and the wall. This will provide protection against damp and mildew.
Other than that, the caulking can also prevent the mirror from moving around a lot by holding it in place.
Best Recommended Bathroom Mirrors if you are feeling Lazy
If you have yet to buy a mirror for your bathroom, you can check out the following products that we offer here at Lumina.
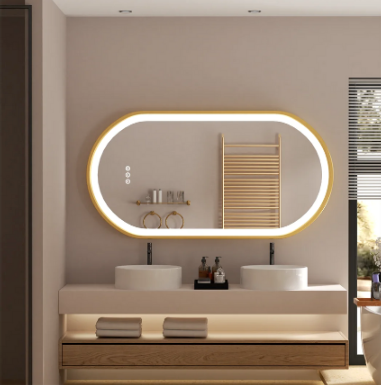
The Luxury Oval LED mirror comes with excellent lighting features as well as a built-in demister pad. The demister pad helps keep the mirror clear and fog-free at all times. The gold aluminum frame and the long oval shape lends this mirror its amazing aesthetics
2.Square Illuminated Bathroom Mirror with Dimmable LED Lights & Anti-Fog

The Square Illuminated Bathroom Mirror comes with a range of smart features. It has dimmable LED lights (that you can choose to light just from the back, front, or both) as well as an anti-fog feature. You can also choose between different color temperatures for the lights
3.Large Round Lighted Bathroom Mirror with RGB LED, Anti-Fog & Dimmable Backlit

The special feature of the Large Round Lighted Bathroom Mirror is the RGB lighting. Usually, bathroom mirrors come with white light, but with RGB, you can create a look of your choice in your vanity space. The brightness of the lights can be adjusted as per your preference. The best thing about this mirror is that if you want the good old white light in the front, it comes with that as well.
Conclusion
And that brings this post to an end.
Installing a bathroom mirror is a simple process, but it can be a bit tricky if you don’t know all the right steps. Taking measurements the right way, installing the brackets properly, etc., can be difficult for someone doing it the first time.
The guide that we’ve shared above addresses all the steps that you need to take for both non-illuminated and illuminated mirrors.


